30/03/2023
La idea de 'instalar OpenGL' es una de las mayores fuentes de confusión para quienes se inician en el desarrollo de gráficos. A menudo, se busca un 'SDK de OpenGL' para descargar, cuando la realidad es que OpenGL no es una biblioteca que se instale de forma independiente. Es un estándar abierto, una Interfaz de Programación de Aplicaciones (API) para renderizar gráficos 2D y 3D, y su implementación reside directamente en los controladores de GPU de tu tarjeta gráfica. Comprender este concepto es el primer paso crucial para trabajar con este potente estándar.
Este artículo desglosará cómo OpenGL se integra en tu sistema operativo, cómo acceder a sus funcionalidades y cómo configurarlo para el desarrollo en diversas plataformas, desde la configuración manual en C++ hasta el uso de bibliotecas auxiliares multiplataforma.
¿Qué es OpenGL y cómo funciona?
OpenGL (Open Graphics Library) es una especificación, no un producto de software concreto que puedas descargar y ejecutar. Es un conjunto de comandos y funciones que le indican a tu hardware gráfico cómo dibujar imágenes en la pantalla. Su poder radica en su capacidad para aprovechar la aceleración por hardware, lo que permite la creación de gráficos complejos y de alto rendimiento.
Desde su lanzamiento, OpenGL ha sido implementado por los fabricantes de tarjetas gráficas (como NVIDIA, AMD e Intel) como parte integral de sus controladores. Cuando actualizas los controladores de tu tarjeta gráfica, en realidad estás actualizando la implementación de OpenGL en tu sistema. Esto significa que para acceder a las versiones más recientes y a las características modernas de OpenGL, el paso más importante es siempre mantener tus controladores de GPU actualizados, descargándolos directamente desde el sitio web del fabricante.
Historia y Evolución de OpenGL
OpenGL ha evolucionado significativamente desde su primera versión, adaptándose a las crecientes demandas de la computación gráfica. A lo largo de los años, ha introducido nuevas funcionalidades, mejoras de rendimiento y cambios en su modelo de programación.
| Versión | Fecha de Lanzamiento |
|---|---|
| 1.1 | 1997-03-04 |
| 1.2 | 1998-03-16 |
| 1.2.1 | 1998-10-14 |
| 1.3 | 2001-08-14 |
| 1.4 | 2002-07-24 |
| 1.5 | 2003-07-29 |
| 2.0 | 2004-09-07 |
| 2.1 | 2006-07-02 |
| 3.0 | 2008-08-11 |
| 3.1 | 2009-03-24 |
| 3.2 | 2009-08-03 |
| 3.3 | 2010-03-11 |
| 4.0 | 2010-03-11 |
| 4.1 | 2010-07-26 |
| 4.2 | 2011-08-08 |
| 4.3 | 2012-08-06 |
| 4.4 | 2013-07-22 |
| 4.5 | 2014-08-11 |
A partir de la versión 3.0, OpenGL introdujo el concepto de perfiles (Core y Compatibility) para separar las funcionalidades modernas de las heredadas, una distinción crucial para el desarrollo actual.
OpenGL en Diferentes Sistemas Operativos
La forma en que OpenGL se integra y se accede puede variar ligeramente entre sistemas operativos debido a cómo cada uno maneja las interfaces binarias de aplicación (ABI).
Microsoft Windows
Windows incluye una biblioteca de enlace, opengl32.dll, desde versiones muy antiguas (Windows NT-4 y 95B). Sin embargo, esta DLL por sí sola solo proporciona una implementación de OpenGL 1.1 o un respaldo de software muy básico. Para acceder a versiones modernas de OpenGL, es imprescindible que los controladores de GPU de tu tarjeta gráfica (descargados directamente del sitio web del fabricante) instalen un ICD (Installable Client Driver) compatible. Windows Update a menudo no instala ni actualiza estos ICDs con las últimas características.
Para el desarrollo, los compiladores de C/C++ que siguen las especificaciones de Windows ABI ya incluyen los encabezados y el código auxiliar del vinculador (opengl32.lib) necesarios.
Configuración Manual de OpenGL en Windows (C/C++)
La configuración manual en Windows implica interactuar con la API de Windows (WinAPI) para crear una ventana, establecer un formato de píxel y crear un contexto de renderizado OpenGL. Este proceso es fundamental para comprender cómo OpenGL se enlaza con el sistema operativo.
Componentes Clave
- WGL (Windows-GL): Un conjunto de funciones específicas de Windows para interactuar con OpenGL. Permite la comunicación entre la API de Windows y OpenGL.
- GDI (Graphics Device Interface): Una interfaz de dibujo 2D de Windows, necesaria para inicializar OpenGL y obtener un contexto de dispositivo (DC) para la ventana, que a su vez se usa para crear un contexto de renderizado (RC) de OpenGL.
Pasos Básicos de Configuración
Para empezar, necesitas crear una ventana WinAPI, establecer su formato de píxel y luego crear el contexto de renderizado de OpenGL. Es importante destacar que el formato de píxel y el contexto inicial solo pueden ser compatibles con OpenGL 1.1. Para las versiones modernas (3.x, 4.x), se requiere un enfoque más avanzado usando extensiones.
El siguiente código de ejemplo ilustra la configuración básica y avanzada en C++ para Windows:
/* We want the core profile, so we include GL/glcorearb.h. When including that, then GL/gl.h should not be included. If using compatibility profile, the GL/gl.h and GL/glext.h need to be included. GL/wglext.h gives WGL extensions. Note that Windows.h needs to be included before them. */ #include <cstdio> #include <Windows.h> #include <GL/glcorearb.h> #include <GL/wglext.h> LRESULT CALLBACK window_procedure(HWND, UINT, WPARAM, LPARAM); void* get_proc(const char*); /* gl_module is for opening the DLL, and the quit flag is here to prevent quitting when recreating the window (see the window_procedure function) */ HMODULE gl_module; bool quit = false; /* OpenGL function declarations. In practice, we would put these in a separate header file and add "extern" in front, so that we can use them anywhere after loading them only once. */ PFNWGLGETEXTENSIONSSTRINGARBPROC wglGetExtensionsStringARB; PFNWGLCHOOSEPIXELFORMATARBPROC wglChoosePixelFormatARB; PFNWGLCREATECONTEXTATTRIBSARBPROC wglCreateContextAttribsARB; PFNGLGETSTRINGPROC glGetString; int WINAPI WinMain(HINSTANCE instance_handle, HINSTANCE prev_instance_handle, PSTR cmd_line, int cmd_show) { /* REGISTER WINDOW */ WNDCLASS window_class; // Clear all structure fields to zero first ZeroMemory(&window_class, sizeof(window_class)); // Define fields we need (others will be zero) window_class.style = CS_HREDRAW | CS_VREDRAW | CS_OWNDC; window_class.lpfnWndProc = window_procedure; window_class.hInstance = instance_handle; window_class.lpszClassName = TEXT("OPENGL_WINDOW"); // Give our class to Windows RegisterClass(&window_class); /* * */ /* CREATE WINDOW */ HWND window_handle = CreateWindowEx(WS_EX_OVERLAPPEDWINDOW, TEXT("OPENGL_WINDOW"), TEXT("OpenGL window"), WS_OVERLAPPEDWINDOW, 0, 0, 800, 600, NULL, NULL, instance_handle, NULL); HDC dc = GetDC(window_handle); ShowWindow(window_handle, SW_SHOW); /* * */ /* PIXEL FORMAT */ PIXELFORMATDESCRIPTOR descriptor; // Clear all structure fields to zero first ZeroMemory(&descriptor, sizeof(descriptor)); // Describe our pixel format descriptor.nSize = sizeof(descriptor); descriptor.nVersion = 1; descriptor.dwFlags = PFD_DRAW_TO_WINDOW | PFD_DRAW_TO_BITMAP | PFD_SUPPORT_OPENGL | PFD_GENERIC_ACCELERATED | PFD_DOUBLEBUFFER | PFD_SWAP_LAYER_BUFFERS; descriptor.iPixelType = PFD_TYPE_RGBA; descriptor.cColorBits = 32; descriptor.cRedBits = 8; descriptor.cGreenBits = 8; descriptor.cBlueBits = 8; descriptor.cAlphaBits = 8; descriptor.cDepthBits = 32; descriptor.cStencilBits = 8; // Ask for a similar supported format and set it int pixel_format = ChoosePixelFormat(dc, &descriptor); SetPixelFormat(dc, pixel_format, &descriptor); /* * */ /* RENDERING CONTEXT */ HGLRC rc = wglCreateContext(dc); wglMakeCurrent(dc, rc); /* * */ /* LOAD FUNCTIONS (should probably be put in a separate procedure) */ gl_module = LoadLibrary(TEXT("opengl32.dll")); wglGetExtensionsStringARB = (PFNWGLGETEXTENSIONSSTRINGARBPROC)get_proc("wglGetExtensionsStringARB"); wglChoosePixelFormatARB = (PFNWGLCHOOSEPIXELFORMATARBPROC)get_proc("wglChoosePixelFormatARB"); wglCreateContextAttribsARB = (PFNWGLCREATECONTEXTATTRIBSARBPROC)get_proc("wglCreateContextAttribsARB"); glGetString = (PFNGLGETSTRINGPROC)get_proc("glGetString"); FreeLibrary(gl_module); /* ** */ /* PRINT VERSION */ const GLubyte *version = glGetString(GL_VERSION); printf("%s ", version); fflush(stdout); /* *** */ /* NEW PIXEL FORMAT*/ int pixel_format_arb; UINT pixel_formats_found; int pixel_attributes[] = { WGL_SUPPORT_OPENGL_ARB, 1, WGL_DRAW_TO_WINDOW_ARB, 1, WGL_DRAW_TO_BITMAP_ARB, 1, WGL_DOUBLE_BUFFER_ARB, 1, WGL_SWAP_LAYER_BUFFERS_ARB, 1, WGL_COLOR_BITS_ARB, 32, WGL_RED_BITS_ARB, 8, WGL_GREEN_BITS_ARB, 8, WGL_BLUE_BITS_ARB, 8, WGL_ALPHA_BITS_ARB, 8, WGL_DEPTH_BITS_ARB, 32, WGL_STENCIL_BITS_ARB, 8, WGL_ACCELERATION_ARB, WGL_FULL_ACCELERATION_ARB, WGL_PIXEL_TYPE_ARB, WGL_TYPE_RGBA_ARB, 0 }; BOOL result = wglChoosePixelFormatARB(dc, pixel_attributes, NULL, 1, &pixel_format_arb, &pixel_formats_found); if (!result) { printf("Could not find pixel format "); fflush(stdout); return 0; } /* */ /* RECREATE WINDOW */ wglMakeCurrent(dc, NULL); wglDeleteContext(rc); ReleaseDC(window_handle, dc); DestroyWindow(window_handle); window_handle = CreateWindowEx(WS_EX_OVERLAPPEDWINDOW, TEXT("OPENGL_WINDOW"), TEXT("OpenGL window"), WS_OVERLAPPEDWINDOW, 0, 0, 800, 600, NULL, NULL, instance_handle, NULL); dc = GetDC(window_handle); ShowWindow(window_handle, SW_SHOW); /* * */ /* NEW CONTEXT */ GLint context_attributes[] = { WGL_CONTEXT_MAJOR_VERSION_ARB, 3, WGL_CONTEXT_MINOR_VERSION_ARB, 3, WGL_CONTEXT_PROFILE_MASK_ARB, WGL_CONTEXT_CORE_PROFILE_BIT_ARB, 0 }; rc = wglCreateContextAttribsARB(dc, 0, context_attributes); wglMakeCurrent(dc, rc); /* * */ /* EVENT PUMP */ MSG msg; while (true) { if (PeekMessage(&msg, NULL, 0, 0, PM_REMOVE)) { if (msg.message == WM_QUIT) break; TranslateMessage(&msg); DispatchMessage(&msg); } // draw(); <- there goes your drawing SwapBuffers(dc); } /* ** */ return 0; } // Procedure that processes window events LRESULT CALLBACK window_procedure(HWND window_handle, UINT message, WPARAM param_w, LPARAM param_l) { /* When destroying the dummy window, WM_DESTROY message is going to be sent, but we don't want to quit the application then, and that is controlled by the quit flag. */ switch(message) { case WM_DESTROY: if (!quit) quit = true; else PostQuitMessage(0); return 0; } return DefWindowProc(window_handle, message, param_w, param_l); } /* A procedure for getting OpenGL functions and OpenGL or WGL extensions. When looking for OpenGL 1.2 and above, or extensions, it uses wglGetProcAddress, otherwise it falls back to GetProcAddress. */ void* get_proc(const char *proc_name) { void *proc = (void*)wglGetProcAddress(proc_name); if (!proc) proc = (void*)GetProcAddress(gl_module, proc_name); return proc; }Linux
En Linux, la instalación de los archivos de desarrollo para OpenGL generalmente se realiza a través de los gestores de paquetes de la distribución. Estos archivos suelen estar contenidos en paquetes dedicados, que a menudo son dependencias de meta-paquetes de desarrollo de aplicaciones de escritorio. Por ejemplo, en distribuciones basadas en Debian (Ubuntu), se pueden instalar con comandos como sudo apt-get install build-essential cmake libx11-dev libxi-dev libgl1-mesa-dev libglu1-mesa-dev libxrandr-dev libxext-dev. Es crucial asegurarse de que los controladores de GPU propietarios (NVIDIA, AMD) estén instalados y actualizados para obtener el rendimiento y las características más recientes de OpenGL.
macOS
Apple ha integrado OpenGL profundamente en macOS, y la versión de OpenGL disponible está estrechamente ligada a la versión del sistema operativo instalada. Los entornos de programación del sistema (como Xcode) proporcionan las definiciones de API OpenGL, por lo que no es necesario un SDK dedicado. Sin embargo, para usar versiones modernas de OpenGL (como la 4.1), a menudo se necesita configurar el contexto de renderizado de manera explícita para solicitar un perfil Core más reciente.
Creación de OpenGL 4.1 con C++ y Cocoa en macOS
Este ejemplo muestra cómo configurar un contexto OpenGL 4.1 en macOS utilizando C++ y el framework Cocoa, que es la base para la creación de aplicaciones en el sistema de Apple.
//Mac_App_H #import <Cocoa/Cocoa.h> #import "Application.hpp" #import <memory> NSApplication* application; @interface MacApp: NSWindow <NSApplicationDelegate>{ std::shared_ptr<Application> appInstance; } @property (nonatomic, retain) NSOpenGLView* glView; -(void) drawLoop:(NSTimer*) timer; @end #import "MacApp.h" @implementation MacApp @synthesize glView; BOOL shouldStop = NO; -(id)initWithContentRect:(NSRect)contentRect styleMask:(NSUInteger)aStyle backing:(NSBackingStoreType)bufferingType defer:(BOOL)flag{ if(self = [super initWithContentRect:contentRect styleMask:aStyle backing:bufferingType defer:flag]){ //sets the title of the window (Declared in Plist) [self setTitle:[[NSProcessInfo processInfo] processName]]; //This is pretty important.. OS X starts always with a context that only supports openGL 2.1 //This will ditch the classic OpenGL and initialises openGL 4.1 NSOpenGLPixelFormatAttribute pixelFormatAttributes[] ={ NSOpenGLPFAOpenGLProfile, NSOpenGLProfileVersion3_2Core, NSOpenGLPFAColorSize, 24, NSOpenGLPFAAlphaSize, 8, NSOpenGLPFADoubleBuffer, NSOpenGLPFAAccelerated, NSOpenGLPFANoRecovery, 0 }; NSOpenGLPixelFormat* format = [[NSOpenGLPixelFormat alloc]initWithAttributes:pixelFormatAttributes]; //Initialize the view glView = [[NSOpenGLView alloc]initWithFrame:contentRect pixelFormat:format]; //Set context and attach it to the window [[glView openGLContext]makeCurrentContext]; //finishing off [self setContentView:glView]; [glView prepareOpenGL]; [self makeKeyAndOrderFront:self]; [self setAcceptsMouseMovedEvents:YES]; [self makeKeyWindow]; [self setOpaque:YES]; //Start the c++ code appInstance = std::shared_ptr<Application>(new Application()); } return self; } - (void)applicationDidFinishLaunching:(NSNotification *)notification { [NSTimer scheduledTimerWithTimeInterval:0.000001 target:self selector:@selector(drawLoop:) userInfo:nil repeats:YES]; } -(void) drawLoop:(NSTimer*) timer{ if(shouldStop){ [self close]; return; } if([self isVisible]){ appInstance->update(); [glView update]; [[glView openGLContext] flushBuffer]; } } - (BOOL)applicationShouldTerminateAfterLastWindowClosed:(NSApplication *)theApplication{ return YES; } - (void)applicationWillTerminate:(NSNotification *)aNotification{ shouldStop = YES; } // --- Application.hpp --- #ifndef Application_hpp #define Application_hpp #include <iostream> #include <OpenGL/gl3.h> class Application{ private: GLuint program; GLuint vao; public: Application(); void update(); ~Application(); }; #endif /* Application_hpp */ // --- Application.cpp --- #include "Application.hpp" Application::Application(){ static const char * vs_source[] = { "#version 410 core " " " "void main(void) " "{ " " const vec4 vertices[] = vec4[](vec4( 0.25, -0.25, 0.5, 1.0), " " vec4(-0.25, -0.25, 0.5, 1.0), " " vec4( 0.25, 0.25, 0.5, 1.0)); " " " " gl_Position = vertices[gl_VertexID]; " "} " }; static const char * fs_source[] = { "#version 410 core " " " "out vec4 color; " " " "void main(void) " "{ " " color = vec4(0.0, 0.8, 1.0, 1.0); " "} " }; program = glCreateProgram(); GLuint fs = glCreateShader(GL_FRAGMENT_SHADER); glShaderSource(fs, 1, fs_source, NULL); glCompileShader(fs); GLuint vs = glCreateShader(GL_VERTEX_SHADER); glShaderSource(vs, 1, vs_source, NULL); glCompileShader(vs); glAttachShader(program, vs); glAttachShader(program, fs); glLinkProgram(program); glGenVertexArrays(1, &vao); glBindVertexArray(vao); } void Application::update(){ static const GLfloat green[] = { 0.0f, 0.25f, 0.0f, 1.0f }; glClearBufferfv(GL_COLOR, 0, green); glUseProgram(program); glDrawArrays(GL_TRIANGLES, 0, 3); } Application::~Application(){ glDeleteVertexArrays(1, &vao); glDeleteProgram(program); }Bibliotecas Auxiliares Multiplataforma para OpenGL
Aunque es posible configurar OpenGL manualmente, el proceso puede ser tedioso y específico de cada sistema operativo. Para simplificar el desarrollo y lograr una mayor portabilidad, se utilizan bibliotecas auxiliares que abstraen la creación de ventanas, la gestión de eventos y la carga de funciones OpenGL.
| Biblioteca | Propósito Principal | Lenguaje Principal | Multiplataforma | Nivel de Abstracción |
|---|---|---|---|---|
| GLFW | Creación de ventanas y manejo de entrada para OpenGL | C | Sí | Medio |
| SDL2 | Biblioteca multimedia general (gráficos, sonido, entrada) | C | Sí | Medio |
| GLEW | Carga de extensiones OpenGL en tiempo de ejecución | C | Sí | Bajo |
| LWJGL | Bindings de bajo nivel para OpenGL y otras libs en Java | Java | Sí | Bajo (para Java) |
Creación de Contexto OpenGL con SDL2 (C/C++)
SDL2 (Simple DirectMedia Layer) es una popular biblioteca multiplataforma que simplifica la creación de ventanas y la gestión de eventos, siendo una excelente opción para proyectos OpenGL.
#define GLEW_STATIC #include <GL/glew.h> #include <SDL2/SDL.h> int main(int argc, char* argv[]) { SDL_Init(SDL_INIT_VIDEO); /* Initialises Video Subsystem in SDL */ /* Setting up OpenGL version and profile details for context creation */ SDL_GL_SetAttribute(SDL_GL_CONTEXT_PROFILE_MASK, SDL_GL_CONTEXT_PROFILE_CORE); SDL_GL_SetAttribute(SDL_GL_CONTEXT_MAJOR_VERSION, 3); SDL_GL_SetAttribute(SDL_GL_CONTEXT_MINOR_VERSION, 2); /* A 800x600 window. Pretty! */ SDL_Window* window = SDL_CreateWindow ( "SDL Context", SDL_WINDOWPOS_UNDEFINED, SDL_WINDOWPOS_UNDEFINED, 800, 600, SDL_WINDOW_OPENGL ); /* Creating OpenGL Context */ SDL_GLContext gl_context = SDL_GL_CreateContext(window); /* Loading Extensions */ glewExperimental = GL_TRUE; glewInit(); /* The following code is for error checking. * If OpenGL has initialised properly, this should print 1. * Remove it in production code. */ GLuint vertex_buffer; glGenBuffers(1, &vertex_buffer); printf("%u ", vertex_buffer); /* Error checking ends here */ /* Main Loop */ SDL_Event window_event; while(1) { if (SDL_PollEvent(&window_event)) { if (window_event.type == SDL_QUIT) { /* If user is exiting the application */ break; } } /* Swap the front and back buffer for flicker-free rendering */ SDL_GL_SwapWindow(window); } /* Freeing Memory */ glDeleteBuffers(1, &vertex_buffer); SDL_GL_DeleteContext(gl_context); SDL_Quit(); return 0; }Configuración Moderna de OpenGL 4.1 en macOS (Xcode, GLFW y GLEW)
GLFW y GLEW son dos bibliotecas esenciales para el desarrollo moderno de OpenGL. GLFW maneja la creación de ventanas y el manejo de entrada, mientras que GLEW facilita la carga de las funciones de OpenGL de las versiones más recientes y las extensiones de hardware.
1. Instalación de GLFW
GLFW se compila desde el código fuente usando CMake. Los pasos generales incluyen descargar GLFW, instalar CMake y Xcode, crear una carpeta de compilación, configurar CMake para generar el proyecto de Xcode, y luego compilar e instalar GLFW desde Xcode en las rutas de sistema (/usr/local/lib y /usr/local/include).
2. Instalación de GLEW
GLEW también se instala desde el código fuente, generalmente a través de la terminal. Una vez descargado, navega a la carpeta de GLEW y ejecuta los comandos make y sudo make install. Esto copiará los archivos de encabezado y las bibliotecas a las rutas del sistema.
3. Configuración del Proyecto Xcode y Prueba
Una vez instalados GLFW y GLEW, un proyecto de Xcode debe configurarse para enlazar con estas bibliotecas y el framework OpenGL. Esto implica añadir las rutas de búsqueda de encabezados y bibliotecas (/usr/local/include, /usr/local/lib) y enlazar OpenGL.framework, libglfw3.a y libGLEW.a.
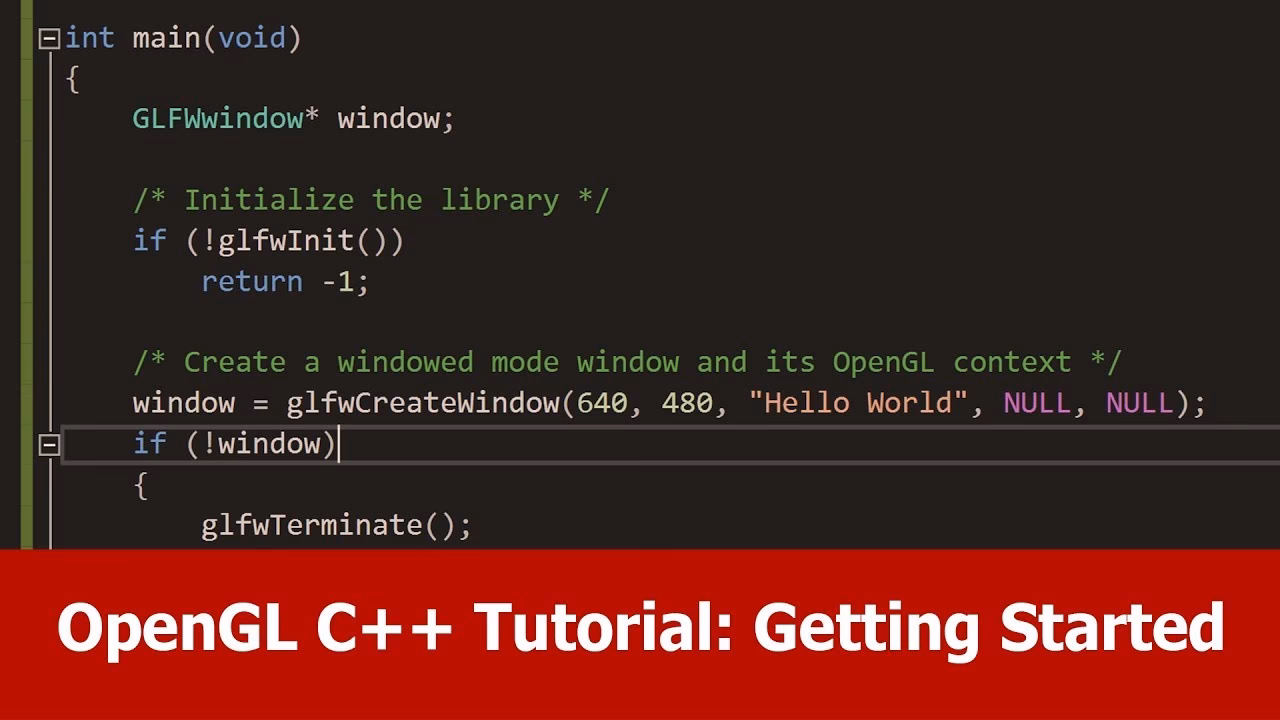
#include <GL/glew.h> #include <GLFW/glfw3.h> // Define main function int main() { // Initialize GLFW glfwInit(); // Define version and compatibility settings glfwWindowHint(GLFW_CONTEXT_VERSION_MAJOR, 3); glfwWindowHint(GLFW_CONTEXT_VERSION_MINOR, 2); glfwWindowHint(GLFW_OPENGL_PROFILE,GLFW_OPENGL_CORE_PROFILE); glfwWindowHint(GLFW_OPENGL_FORWARD_COMPAT, GL_TRUE); glfwWindowHint(GLFW_RESIZABLE, GL_FALSE); // Create OpenGL window and context GLFWwindow* window = glfwCreateWindow(800, 600, "OpenGL", NULL, NULL); glfwMakeContextCurrent(window); // Check for window creation failure if (!window) { // Terminate GLFW glfwTerminate(); return 0; } // Initialize GLEW glewExperimental = GL_TRUE; glewInit(); // Event loop while(!glfwWindowShouldClose(window)) { // Clear the screen to black glClearColor(0.0f, 0.0f, 0.0f, 1.0f); glClear(GL_COLOR_BUFFER_BIT); glfwSwapBuffers(window); glfwPollEvents(); } // Terminate GLFW glfwTerminate(); return 0; }Creación de Contexto OpenGL con Java y LWJGL 3.0
LWJGL (Lightweight Java Game Library) es una biblioteca que proporciona bindings de bajo nivel para OpenGL y otras bibliotecas gráficas en Java, permitiendo el desarrollo de aplicaciones multiplataforma con un alto rendimiento.
// --- Displaymanager.java --- import org.lwjgl.glfw.*; import static org.lwjgl.glfw.Callbacks.*; import static org.lwjgl.glfw.GLFW.*; import static org.lwjgl.opengl.GL11.*; import static org.lwjgl.system.MemoryUtil.*; / * Class Containing code related to inflating Opengl Window */ public class Displaymanager { private static long window; public static void createDisplay(){ // Setup an error callback. The default implementation // will print the error message in System.err. GLFWErrorCallback.createPrint(System.err).set(); // Initialize GLFW. Most GLFW functions will not work before doing this. if ( !glfwInit() ) throw new IllegalStateException("Unable to initialize GLFW"); // Configure our window glfwDefaultWindowHints(); // optional, the current window hints are already the default glfwWindowHint(GLFW_VISIBLE, GLFW_FALSE); // the window will stay hidden after creation glfwWindowHint(GLFW_RESIZABLE, GLFW_TRUE); // the window will be resizable int WIDTH = 300; int HEIGHT = 300; // Create the window window = glfwCreateWindow(WIDTH, HEIGHT, "Hello World!", NULL, NULL); if ( window == NULL ) throw new RuntimeException("Failed to create the GLFW window"); // Setup a key callback. It will be called every time a key is pressed, repeated or released. glfwSetKeyCallback(window, (window, key, scancode, action, mods) -> { if ( key == GLFW_KEY_ESCAPE && action == GLFW_RELEASE ) glfwSetWindowShouldClose(window, true); // We will detect this in our rendering loop }); // Get the resolution of the primary monitor GLFWVidMode vidmode = glfwGetVideoMode(glfwGetPrimaryMonitor()); // Center our window glfwSetWindowPos( window, (vidmode.width() - WIDTH) / 2, (vidmode.height() - HEIGHT) / 2 ); // Make the OpenGL context current glfwMakeContextCurrent(window); // Enable v-sync glfwSwapInterval(1); // Make the window visible glfwShowWindow(window); } public static boolean isCloseRequested(){ return glfwWindowShouldClose(window); } public static void updateDisplay(){ glClear(GL_COLOR_BUFFER_BIT | GL_DEPTH_BUFFER_BIT); // clear the framebuffer glfwSwapBuffers(window); // swap the color buffers // Poll for window events. The key callback above will only be // invoked during this call. glfwPollEvents(); } public static void destroyDisplay(){ // Terminate GLFW and free the error callback cleanUp(); glfwTerminate(); glfwSetErrorCallback(null).free(); } private static void cleanUp() { // Free the window callbacks and destroy the window glfwFreeCallbacks(window); glfwDestroyWindow(window); } } // --- OpenGlMain.java --- import org.lwjgl.opengl.GL; import renderEngine.Displaymanager; import static org.lwjgl.opengl.GL11.glClearColor; / * Class to test the opengl Window */ public class OpenGlMain { public static void main(String[] args) { Displaymanager.createDisplay(); // This line is critical for LWJGL's interoperation with GLFW's // OpenGL context, or any context that is managed externally. // LWJGL detects the context that is current in the current thread, // creates the GLCapabilities instance and makes the OpenGL // bindings available for use. GL.createCapabilities(); while (!Displaymanager.isCloseRequested()){ // Set the clear color glClearColor(1.0f, 0.0f, 0.0f, 0.0f); Displaymanager.updateDisplay(); } Displaymanager.destroyDisplay(); } }OpenGL Moderno vs. Antiguo: Perfiles y Conceptos Clave
Es fundamental comprender que el OpenGL moderno (versiones 3.x y 4.x) difiere significativamente del OpenGL “antiguo” (versiones 1.x y 2.x). El OpenGL moderno se centra en un modelo de programación basado en shaders y búferes, eliminando muchas de las funciones “inmediatas” (como glBegin() y glEnd()) que eran comunes en las versiones anteriores.
A partir de OpenGL 3.0, se introdujeron los conceptos de perfil Core y perfil de Compatibilidad:
- Perfil Core: Rompe la compatibilidad con versiones anteriores a favor de mejoras de rendimiento y nuevas características. Elimina por completo muchas funciones heredadas. Es el perfil recomendado para todas las aplicaciones nuevas y modernas.
- Perfil de Compatibilidad: Mantiene la compatibilidad con todas las versiones hasta la 1.0, pero algunas características nuevas no están disponibles. Solo debe utilizarse para sistemas antiguos o para portar aplicaciones heredadas.
Al iniciar un nuevo proyecto OpenGL, es crucial especificar que se desea un contexto con el perfil Core para aprovechar las capacidades y el rendimiento de las GPU modernas.
Preguntas Frecuentes sobre OpenGL
¿Necesito descargar un SDK de OpenGL?
No. OpenGL no es una biblioteca que se descarga e instala por separado. Su implementación está incluida en los controladores de GPU que vienen con tu tarjeta gráfica. Para el desarrollo, los compiladores y entornos de desarrollo (como Visual Studio, Xcode) ya proporcionan los encabezados y bibliotecas de enlace necesarios.
¿Mi tarjeta gráfica es compatible con la última versión de OpenGL?
La compatibilidad depende de tu hardware de GPU y de la versión de los controladores de GPU instalados. Las tarjetas gráficas modernas suelen ser compatibles con las últimas versiones. Siempre es recomendable visitar el sitio web del fabricante de tu GPU (NVIDIA, AMD, Intel) y descargar los controladores más recientes.
¿Por qué mi ventana OpenGL aparece en negro o parpadea?
Una ventana en negro puede indicar que el contexto OpenGL no se ha creado correctamente, que no hay nada dibujándose o que el búfer no se está intercambiando. El parpadeo suele ser un problema de falta de doble búfer o de sincronización vertical (V-Sync). Asegúrate de configurar el doble búfer (PFD_DOUBLEBUFFER en Windows, o similar en otras bibliotecas) y de llamar a SwapBuffers o su equivalente al final de cada ciclo de renderizado. También verifica que tus controladores estén actualizados.
¿Qué son GLEW, GLFW, SDL2 y LWJGL?
Son bibliotecas de terceros que simplifican el desarrollo con OpenGL. No son OpenGL en sí mismas, sino que facilitan tareas como la creación de ventanas, el manejo de entrada (teclado, ratón), y la carga de funciones y extensiones de OpenGL, haciendo el código más portátil y fácil de escribir. Son herramientas auxiliares muy recomendadas.
¿Puedo usar OpenGL con lenguajes diferentes a C/C++?
Sí. Aunque OpenGL está escrito en C, existen "bindings" (enlaces) que permiten usarlo desde otros lenguajes de programación como Java (con LWJGL), Python (con PyOpenGL), C# (con OpenTK), y muchos más. Estos bindings traducen las llamadas de función del lenguaje elegido a las funciones de OpenGL.
La "instalación" de OpenGL es, en esencia, una cuestión de asegurar que tus controladores de GPU estén actualizados y de configurar correctamente tu entorno de desarrollo para interactuar con la implementación de OpenGL provista por dichos controladores. Ya sea que optes por la configuración manual o por bibliotecas auxiliares multiplataforma, el camino hacia la creación de gráficos 2D y 3D en tiempo real es ahora más accesible que nunca. ¡Anímate a experimentar y dar vida a tus propias creaciones visuales!
Si quieres conocer otros artículos parecidos a Guía Completa para Instalar y Configurar OpenGL puedes visitar la categoría Librerías.